

All kits available for purchase in-store, Toms River NJ or Online by clicking here!
Click Your Kit for instructions – Or Click here to purchase Ready-to-make Craft Kits
Videos Coming Soon!
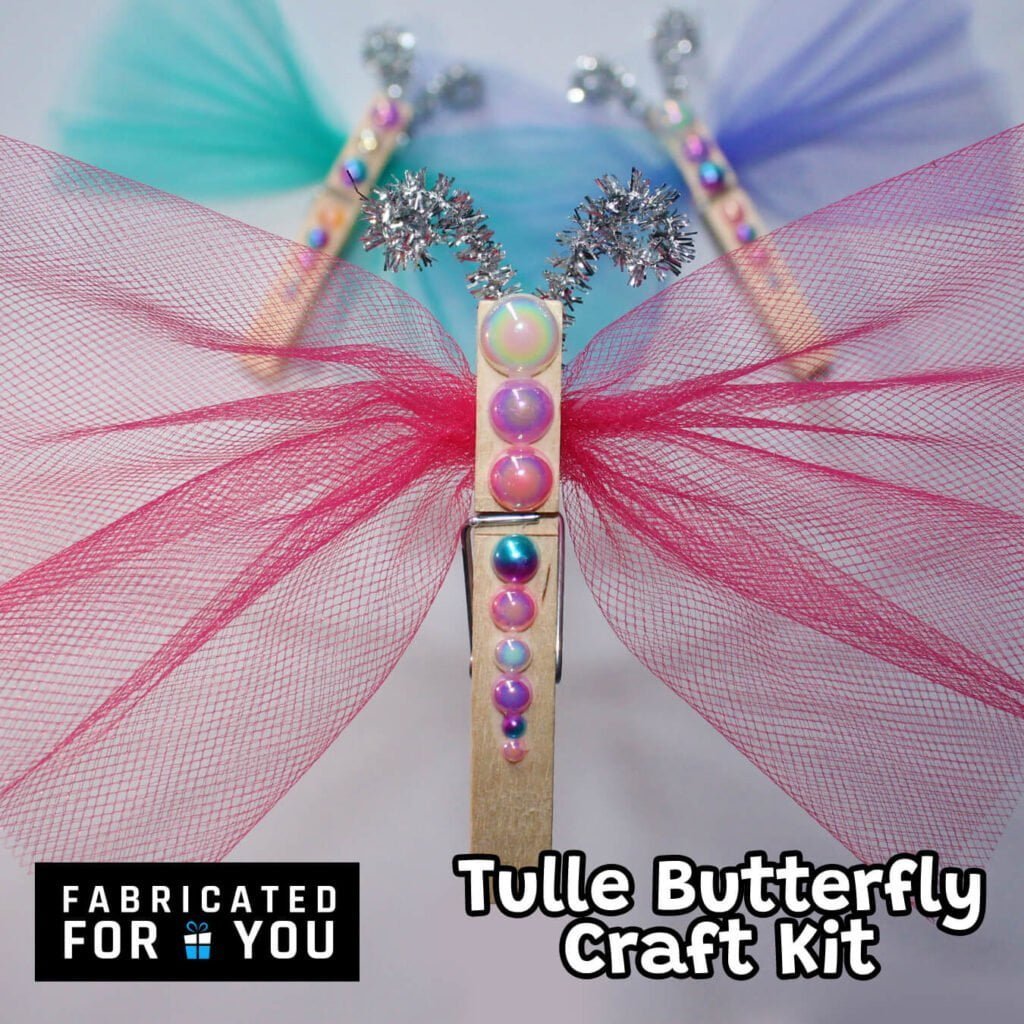




Tulle Butterfly Craft Kit
Kit Includes: (3) clothespins, (3) Tulle rectangles, 6” x 10 ¾”, (1) Silver Pipe cleaner, Assorted Pearls Adult Supervision Required: Glue or Hot Glue and Scissors
Instructions:
- Cut the pipe cleaner into three even pieces. Fold each piece in half to form a “v” and curl the ends to make the antenna.
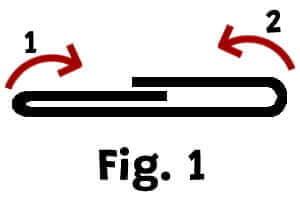
- Take one piece of tulle and place on table in front of you, so the longest side is going left to right. Take the left short end and fold towards the middle, slightly past the center of the rectangle. Then take the right end, and do the same, slightly overlapping the edges. See Figure 1.
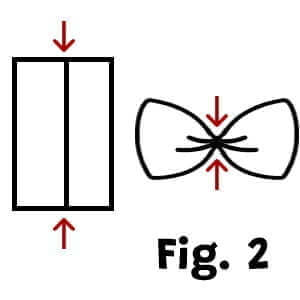
- Gather the center of the tulle together pinching from top to bottom in the center of your folded piece and insert it into the clothespin. See Figure 2. Repeat for remaining tulle and clothespins.
- Glue pearls along the center of each clothespin starting at the opening end, to create the body.
- Insert the antenna into the mouth of each clothespin, you may glue if desired.
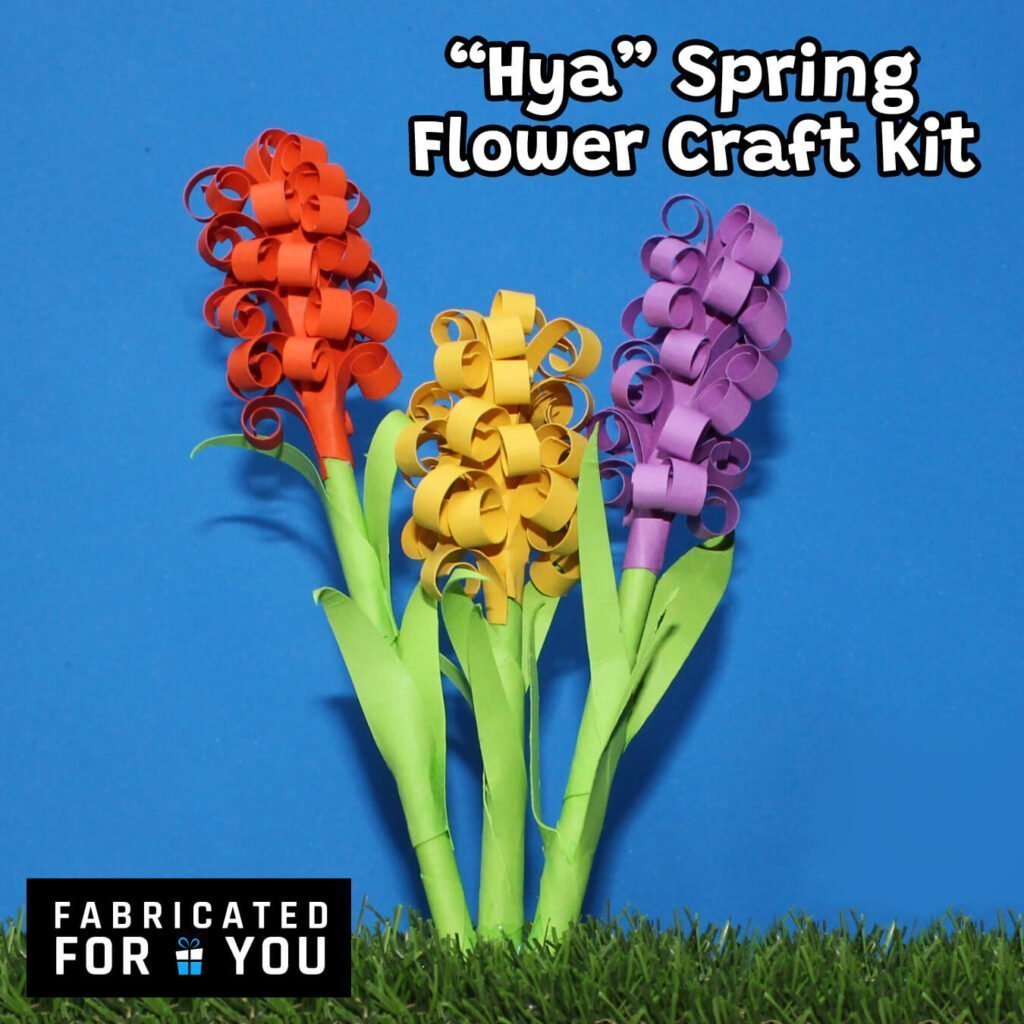
“Hya” Spring Flower Craft Kit
Kit Includes: (3) Pre-Printed Petal Rectangles in 3 colors, (2) 2”x 8.5” Green Cardstock Rectangles, (1) Toothpick, (3) Pre-Printed leaf pairs on Green Cardstock Adult Supervision Required: Glue or Hot Glue and Scissors
Instructions:
- Cut along outside edge of the 3 Petal Rectangles with the dotted lines.
- Cut along each dotted line, stopping when you reach the first solid line.
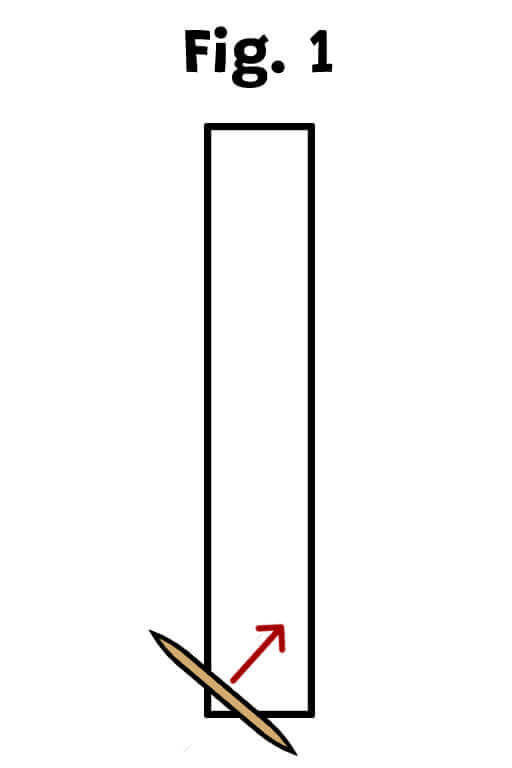
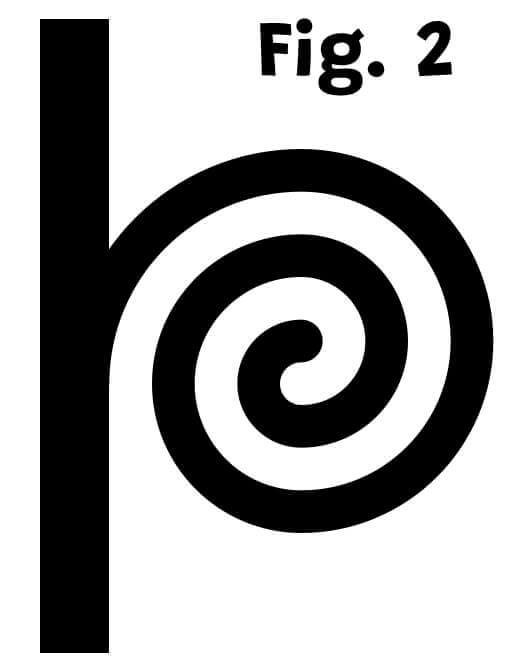
- With the side with ink facing away from you, use a toothpick to roll each fringe slice down towards the bottom of the rectangle to form the petals.
- Take one of the green cardstock rectangles and, starting in the corner, use the toothpick to roll the paper diagonally to form a long tube for the stem. Apply a small amount of glue periodically as you roll to secure in place. Allow to dry. Repeat with remaining two green rectangles.
- At one end of one of the green stems, start gluing one of the petal rectangles with printed ink side glued against the stem, and the rolls going up and outward. Gently wrap around the stem at a slight angle applying small amounts of glue along the way until you reach the end. Repeat with other stems and petal pieces.
- Cut out the leaf pieces and use the toothpick to curl the pointed ends slightly outward.
- Glue two sets of leaves to each stem.
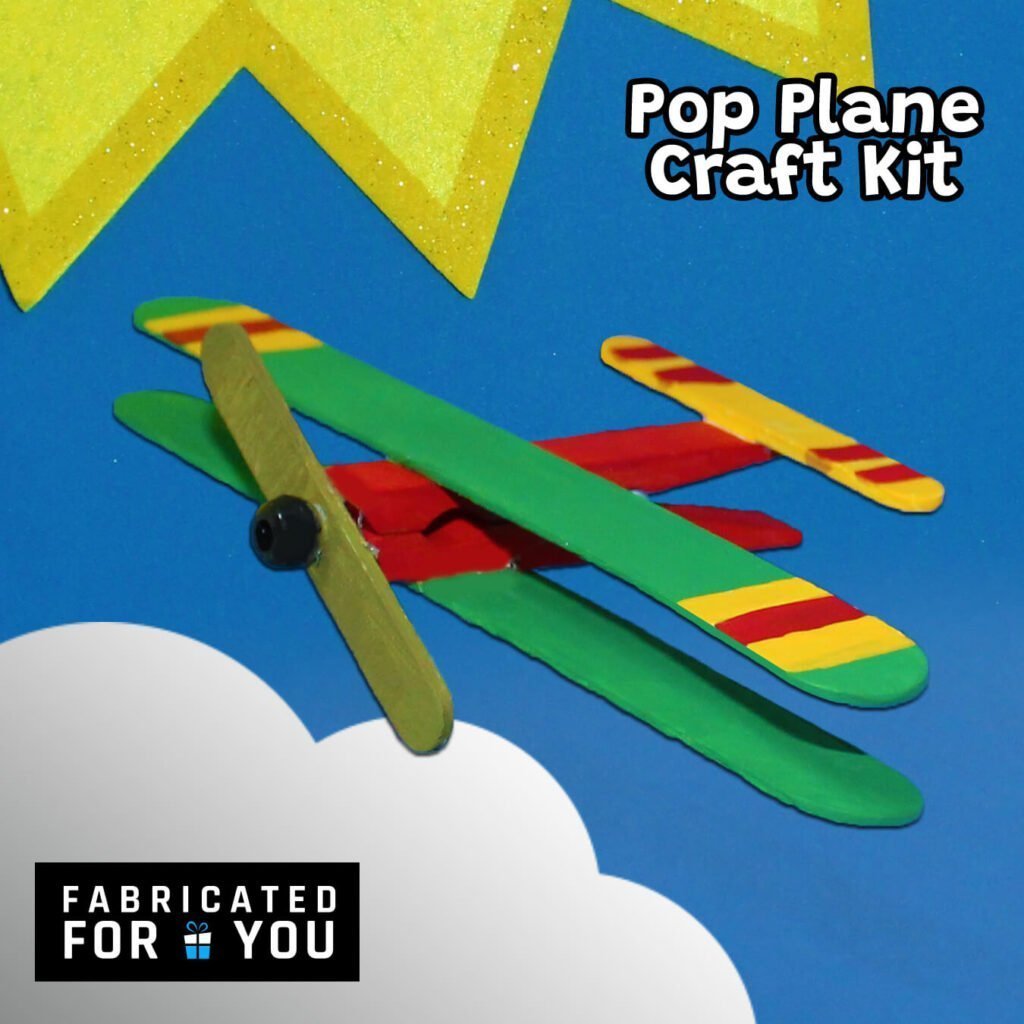
Pop Plane Craft Kit
Kit Includes: (2) Jumbo popsicle sticks, (2) Mini popsicle sticks, (1) Wooden clothespin, (1) Small Black bead, (Red, Green, Yellow) Acrylic Paint, Paint Brushes Adult Supervision Required: Glue or Hot Glue and Scissors
Instructions:
- Paint the following pieces as desired, then let dry
 Clothespin- plane body color
 Jumbo popsicle sticks- front wings color
 1 Mini popsicle stick – tail wing color
 1 Mini popsicle stick – propeller color
- Glue the jumbo popsicle sticks perpendicular and evenly to the top and bottom of the clothespin, half of an inch down from the end that opens.
- Glue the mini popsicle stick (tail) to the back of the clothespin of the top side.
- Glue the remaining mini popsicle stick (propeller) to the front of the clothespin on a slight angle.
- Glue the black bead to the center of the propeller.
- Add any additional paint or decorations to the wings as desired.
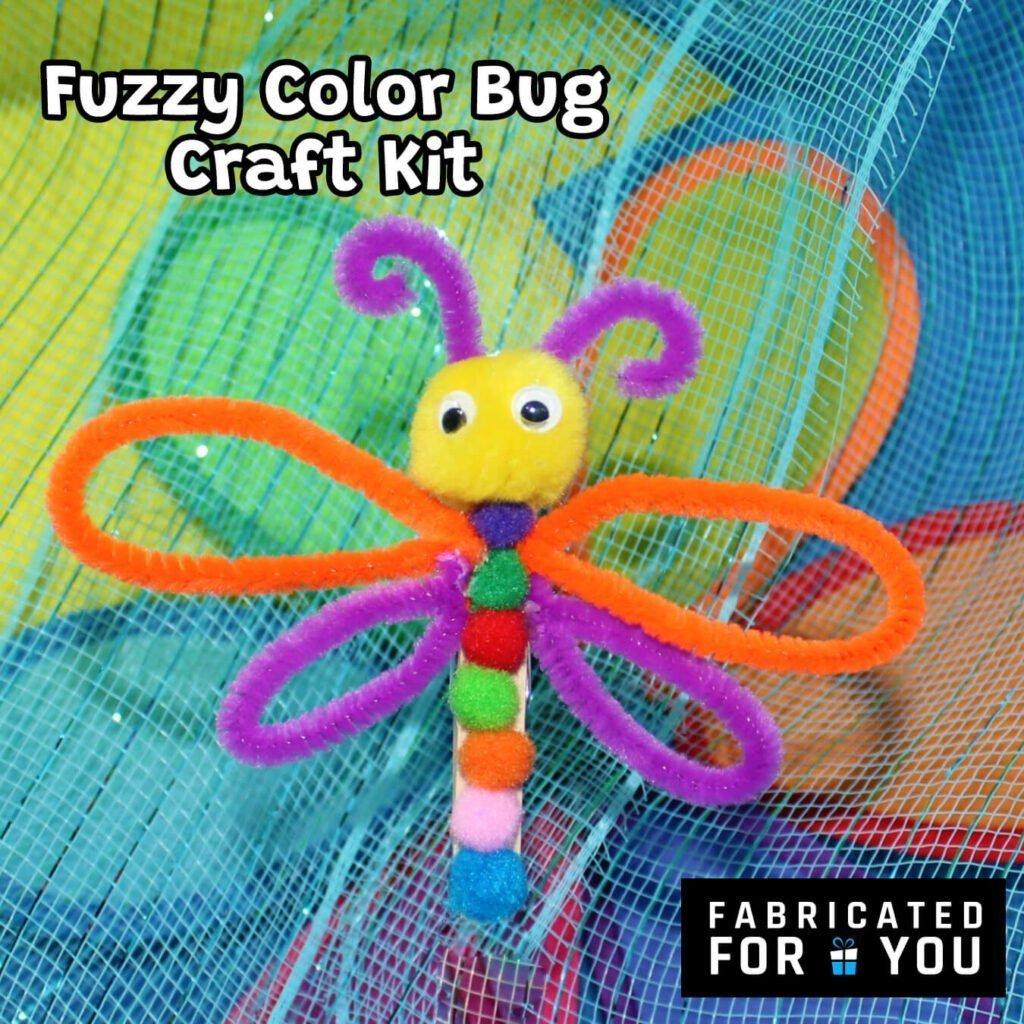
Fuzzy Color Bug Craft Kit
Kit Includes: (1) Wooden Clothespin, (1) 1” Pom Pom, (2) Pipe Cleaners of different colors, (7) 10mm Poms Assorted Colors, (2) 7mm Paste on Eyes Adult Supervision Required: Glue or Hot Glue and Scissors
Instructions:
- Cut one pipe cleaner in thirds for the small wings and antenna. Fold one of those pieces in half, to form a “v” and curl the ends for the antennas. Fold the other two pieces in half, leaving the folded edge rounded, and twist the ends together to form two wings.
- Cut the remaining pipe cleaner in half. Fold each piece in half, leaving the folded edge rounded, and twist the ends together to form two larger wings.
- Glue the antenna to the open end of the clothespin on the top surface.
- Glue the 1” pom pom to the end of the clothespin over the base of the antenna. Glue the two eyes to this pom pom.
- Glue the larger set of wings just below the 1” pom pom, about 1/4” on the surface of the clothespin. Glue the smaller set of wings just below the larger ones.
- Glue the 10mm pom poms along the clothespin, starting below the 1” pom pom, covering the edges of the wings on the surface of the clothespin.
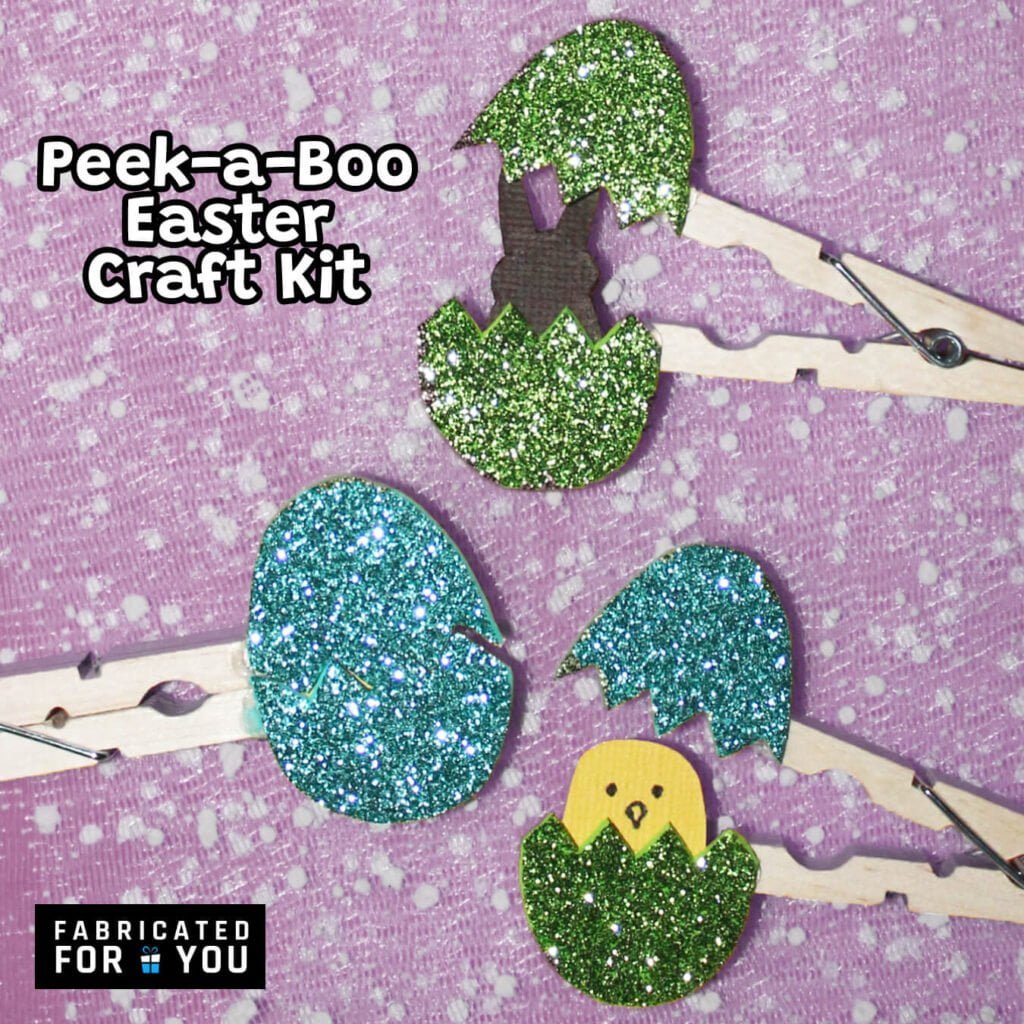
Peek-a-boo Easter Craft Kit
Kit Includes: (3) Clothespins, Templates, (1) 2”x 2” Yellow cardstock, (1) 2”x 2” Brown cardstock, (2) 2.75”x 3.5” Colored glitter craft foam
You Need: Glue or Hot Glue, Scissors, Pen or Marker Adult Supervision Required: Hot Glue and Scissors
Instructions:
- Cut out each templates piece.
- Trace and cut out (3) Egg Tops and (3) Egg Bottoms on desired colors of glitter foam.
- Trace and cut out as desired chicks or bunnies. Draw a face on the chicks in upper part of body.
- Glue 1 chick or bunny to the back of an Egg Bottom, letting it peek out above the jagged edge of the egg.
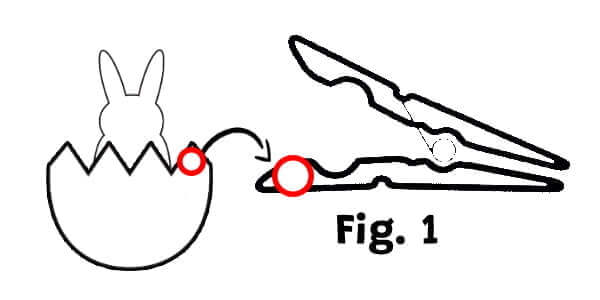
- Hold open one clothespin, to avoid gluing it closed. Put a dab of hot glue on either the left or right top corner of an egg bottom. Attach to bottom wood piece, at the end of the open side of the clothespin, so that the jagged teeth are at level with the surface from the inner part of the clothespin. See Figure 1.
- Put a dab of hot glue on the corresponding left or right of an Egg Top, and attach to the end of the top part of the clothespin, making sure that when closed the egg pieces fit together nicely.
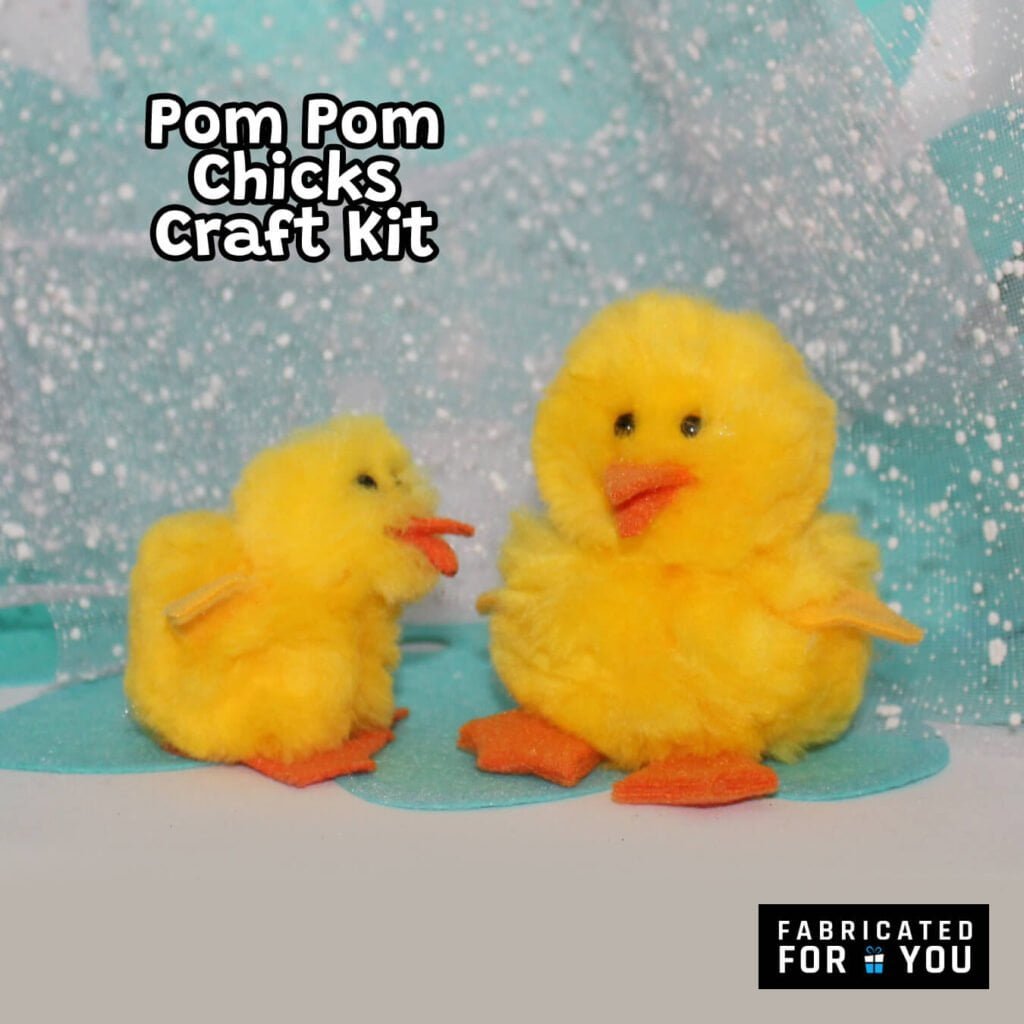
Pom Pom Chicks
Kit Includes: (1) 1.5” Yellow Pom, (2) 2” Yellow Pom, (1) 3” Yellow Pom, (4) Black Beads, (1) 2.5” x 3” piece of yellow fleece, (1) 3.5” x 5” piece of orange felt, Templates
You Need: Glue or Hot Glue, Scissors, Pen or Marker Adult Supervision Required: Hot Glue and Scissors
Instructions:
- Cut out templates and trace onto material listed on template piece. Cut out the shapes from material.
- Fold the beak pieces in half and place a small dot of glue inside the fold to hold it together slightly.
- Glue the folded beak onto the front of the 2” pom, by separating the fluff, and placing it into the center.
- Glue the two black beads above the beak to form eyes, keeping to the surface of the pom to avoid hiding them.
- Glue the 2” pom with the eyes and beak to the top of the 3” pom placing it slightly towards the front.
- Glue a wing to each side of the body.
- Glue the feet to the front edge of the round base.
- Glue the base with the feet attached, to the bottom of the 3” pom, making sure that the feet are facing towards the face.
- Repeat all steps above to make a smaller chick using the 1.5” yellow pom for the head and the remaining 2” pom for the body.
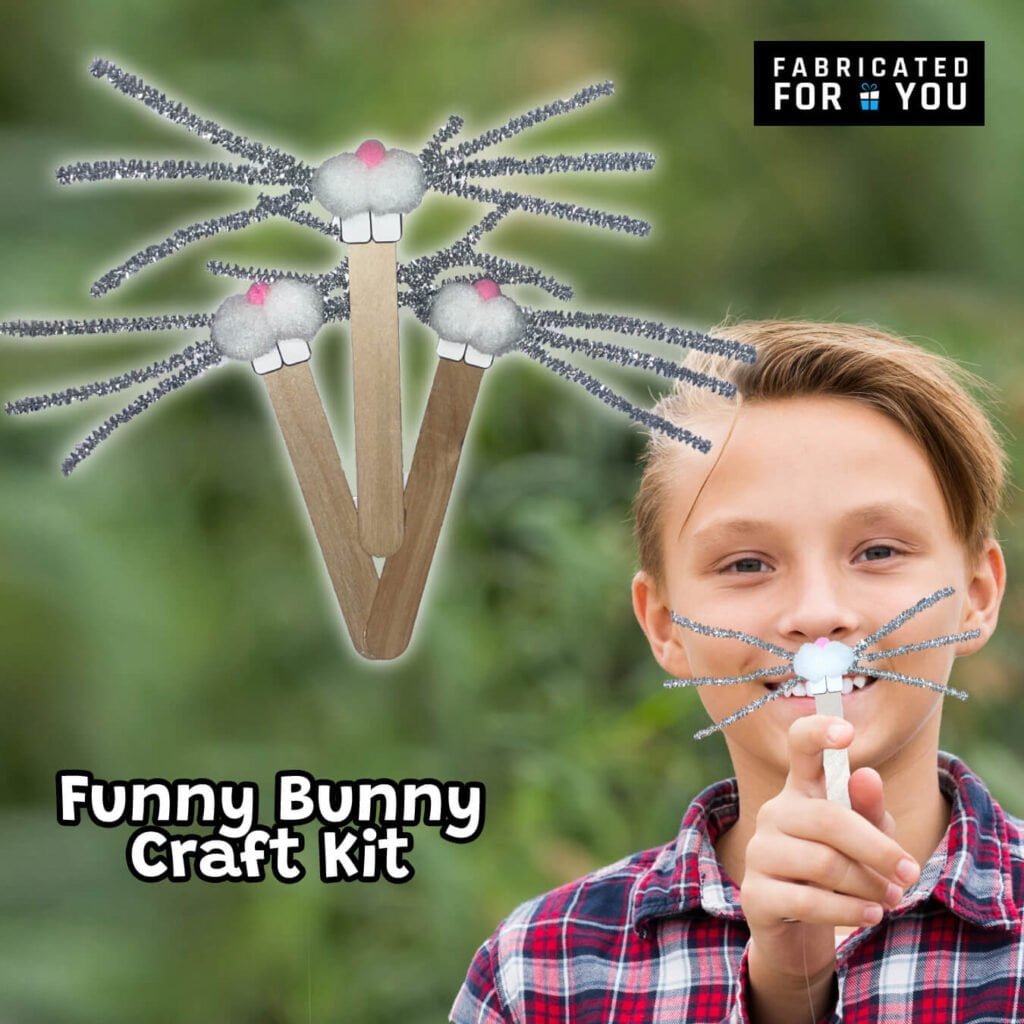
Funny Bunny Craft Kit
Kit Includes: (6) 1” White Poms, (3) 10mm Pink Poms, (6) Pipe Cleaners, (3) Jumbo Popsicle Sticks, (3) Teeth Sets
You Need: Glue or Hot Glue, Scissors, Pen or Marker Adult Supervision Required: Hot Glue and Scissors
Instructions:
- Cut out teeth sets and cut each pipe cleaner into three even pieces.
- Glue two white poms together side by side. Repeat two more times with remaining white pom poms.
- Glue one pink pom in the center of each white poms set where the two poms meet.
- With the pink pom on top, Glue 3 pieces of pipe cleaner on each left and right white pom outward in a fan shape to form whiskers.
- Glue one set of teeth, flat side on top, on each jumbo Popsicle stick about 1/4“ down from the rounded edge.
- Glue each pom set to each Popsicle stick just above the teeth, pink pom up, covering the visible rounded edge and the top flat part of teeth.
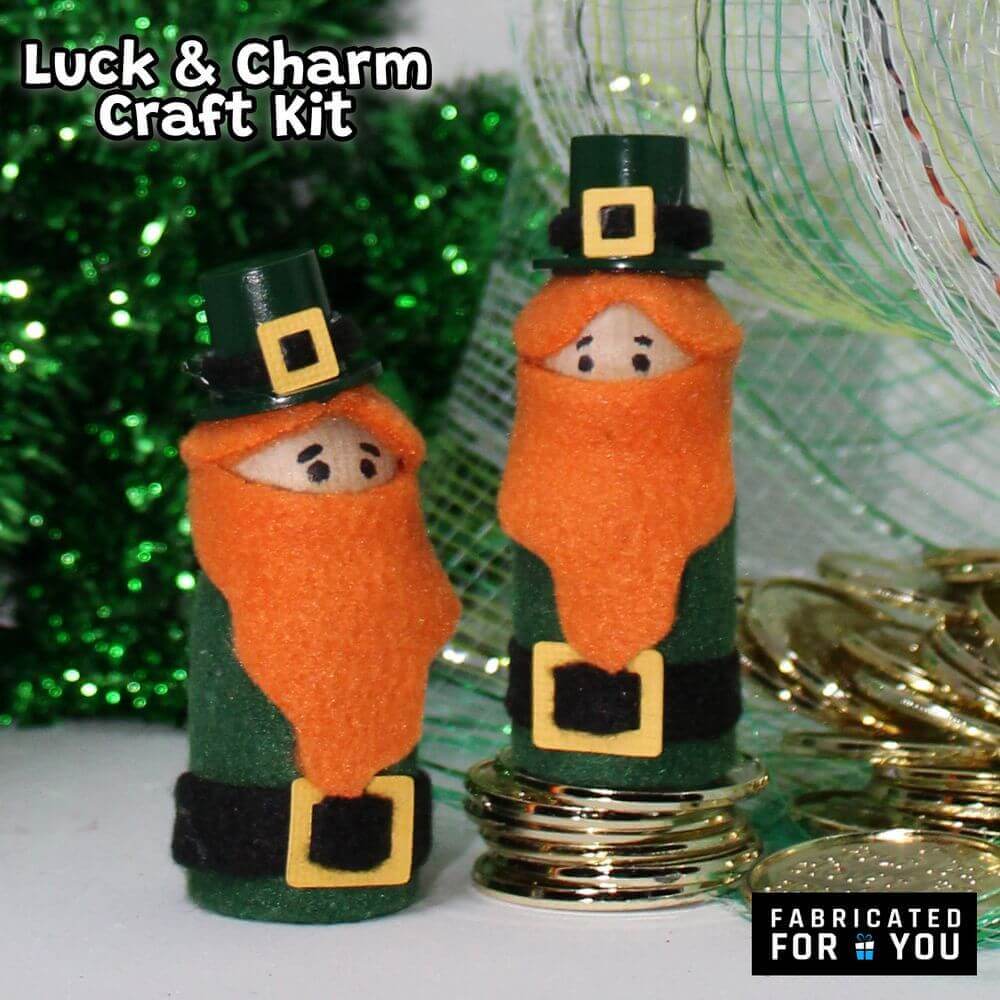
Luck & Charm Peg People
Kit Includes: (2) Wood Pegs, (1) Orange Fleece, (1) Green Fleece, (1) Black Fleece, (2) Belt Buckle, (2) Hat Buckle, (2) Green hats, (1) Hair Template, (1) Beard Template
You Need: Glue or Hot Glue, Scissors, Pen or Marker Adult Supervision Required: Hot Glue and Scissors
Instructions:
- Cut out templates, trace onto orange fleece, and cut out 2 of each template. You are making 2 beards, and 2 hair pieces.
- Cut (2x) 3” x 1.5” green fleece pieces and glue (1) around body of each wood peg, lining the long side with bottom of wood peg.
- Cut the black fleece into (2x) 1/4” x 3” strips for the BELTS, and (2x) skinny 1/8” x 3” strips for the hat TRIMS.
- Put buckle with two holes on BELT. Come in from one side, go over the middle bar, and then down other hole. Repeat for each, slide buckle to middle of the BELT.
- Glue the BELT around the peg 1/4” from the bottom.
- Place a small line of glue along top edge of beard and place onto wood peg’s head, about halfway down.
- Place a small line of glue on edge of hair piece (side opposite the ‘v’ cut) and place on front of head above beard leaving gap for eyes. Continue gluing the hair down on sides, overlapping in back to lay flat on head.
- Draw two dots for eyes with marker above the beard.
- Glue the small buckle to middle of the black TRIM.
- Glue the TRIM around the hat, cutting the excess off.
- Glue the hat on top of the head.
Valentine’s Pom Pom People
Kit Includes: (3) 2” pom poms, (6) 3” piece of silver Pipe Cleaner, (6) 3/4″ paper hearts, (3) 2” square of red fleece, (6) small black beads (1) heart feet template
You Need: Glue or Hot Glue, Scissors Adult Supervision Required: Hot Glue and Scissors
Instructions:
- Fold one piece of pipe cleaner in half and twist ends together. Glue a paper heart to the folded end to form an antenna. Repeat to make a total of six (6) antenna.
- Glue two (2) antenna to the top of one pom pom. Repeat with other pom poms.
- Using the template, cut out three (3) feet from the red pieces of fleece. Glue one to the bottom of each pom pom.
- Glue two (2) black beads to the front of each pom pom for eyes.
Heart Pillow
Kit Includes: 8”x3” pieces of Fleece, Stuffing, Template
You Need: Glue or Hot Glue, Scissors Adult Supervision Required: Hot Glue and Scissors
Instructions:
- Take one piece of fleece and fold in half, short ends touching. Place template onto fleece making sure the straight edge of the template is along the folded edge of the fleece.
- With a fine tip marker, trace the template onto the fleece then cut fleece along those lines, keeping fleece folded in half. Repeat for remaining pieces of fleece. Refold the fleece so the pen/marker is to the inside.
- With fleece pieces still folded in half, lay one on top of the other to form a heart shape. (see figure 1)
- When folded, you have a top, inside, and bottom of each of 4 strips.
- Weaving. Follow figures below as a guide.
- You can secure the woven edges with glue to keep them in place. When done weaving you should end up with a pocket between the back and the front.
- place stuffing inside the heart and secure the edges closed with glue.
For the first row in step 5, “B-1 goes inside A-1”, Keeping both layers of B-1 together, stick the strip inside the two layers of A-1, making the top layer of A-1 be on top of B1, and the bottom of A-1 underneath B-1.
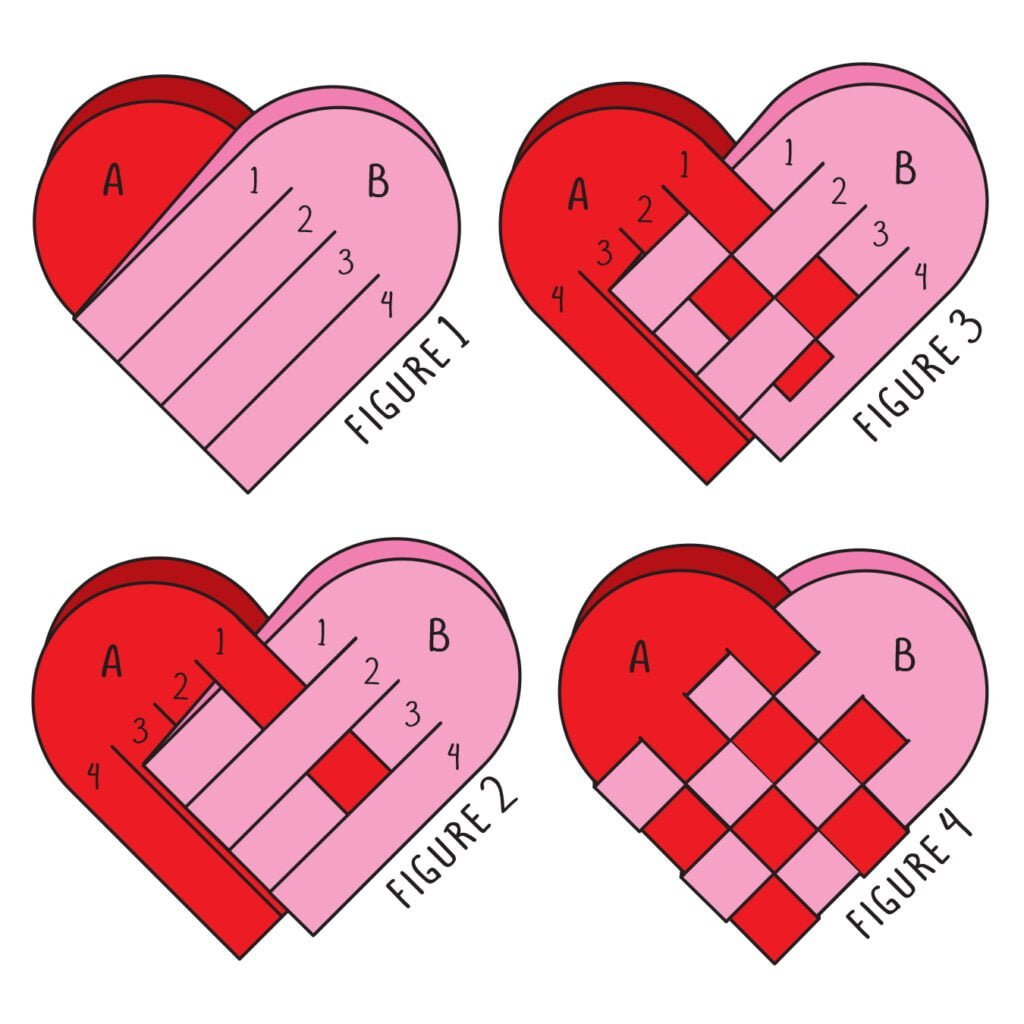
| First row: B-1 goes inside layers of A-1 A-1 then goes inside B-2 B-3 goes inside A-1 A-1 goes inside B-4 | Third Row B-1 goes inside A-3 A-3 goes inside B-2 B-3 goes inside A-3 A-3 goes inside B-4 |
| Second row: A-2 goes inside B-1 B-2 goes inside A-2 A-2 goes inside B-3 B-4 goes inside A-2 | Fourth row: A-4 goes inside B-1 B-2 goes inside A-4 A-4 goes inside B-3 B-4 goes inside A-4 |
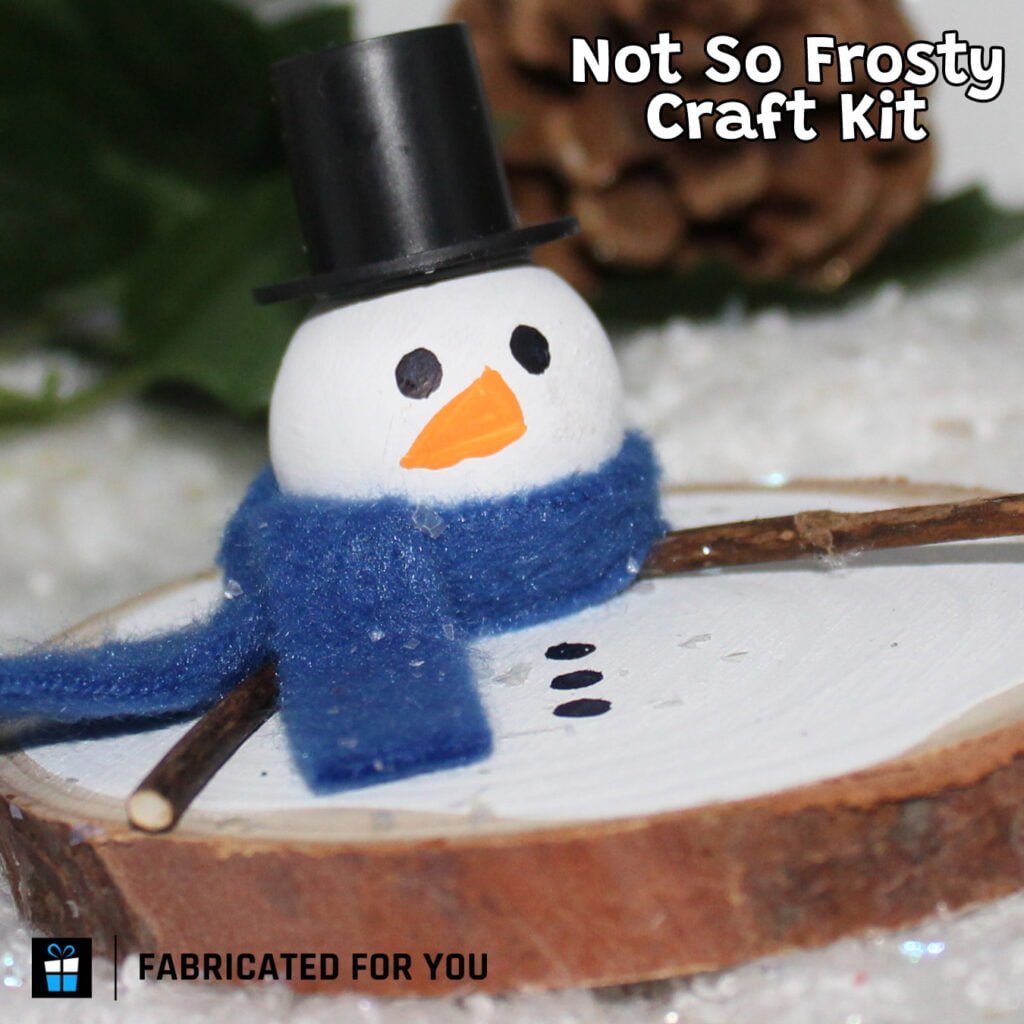
Not So Frosty
Kit Includes: (1) 2”-3” wood slice, (1) 1” round wood ball, (1) Mini black top hat, Strip of colored fleece, (White, Black Orange) Acrylic Paint, 2 Paint Brushes, (2) Small Twigs
You Need: Glue or Hot Glue, Scissors Adult Supervision Required: Hot Glue and Scissors
Instructions:
- Paint the 1” wood ball white for the head. On the wood slice paint an uneven circle of white for the melted body. Let dry.
- Glue the head onto the wood slice slightly off center. Glue the hat onto the head.
- Paint desired face onto the head. Let dry.
- Paint buttons onto melted body under the head.
- Glue twigs under the head to form the arms.
- Wrap a the piece of fleece around the neck for the scarf.
Clothespin Santa
Kit Includes: (3) Clothespins, (6) 1” White Poms, (1) 1.5” White Pom, (3) 10mm Red Poms, (2) Pieces Green Felt, Red Acrylic Paint, 5” string, Paint Brush
You Need: Glue or Hot Glue, Scissors Adult Supervision Required: Hot Glue and Scissors
Instructions:
- Remove the spring from each of the clothespins. Glue the back end of the clothespin pairs together, then glue the three pairs together to form a fan shape. Allow it to dry.
- Paint attached clothespins red, let dry.
- Glue the 1.5” white pom pom to the pointed end of the clothespins to form the top of the hat.
- Glue the 1” white pom poms to the lower edge of the hat to create the brim.
- Cut out two leaf shapes from the piece of green felt and glue onto the front of the hat.
- Glue the three red pom poms onto the leaf to become holly berries.
- Tie a knot in the ribbon and then glue to the back of the hat near the top for hanging.
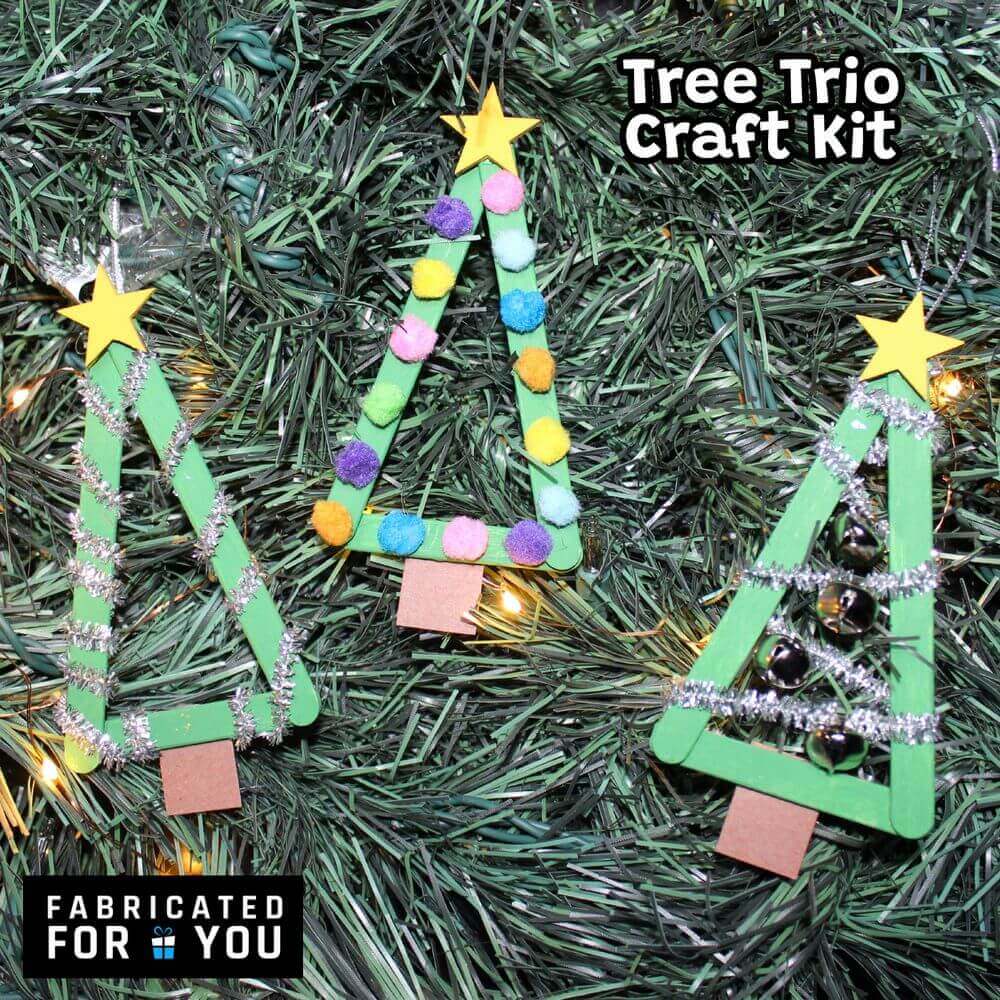
Tree Trio
Kit Includes: (6) 4.5” wood sticks, (3) 2.5” wood sticks, (3) ~1” piece brown paper, (3) 1” wood star, (4) 10mm bells, Assorted 10mm poms, (3) Tinsel Pipe Cleaners, (Red, Green, Yellow) Acrylic Paint, (3) 5” string, Paint Brushes
You Need: Glue or Hot Glue, Scissors Adult Supervision Required: Hot Glue and Scissors
Instructions:
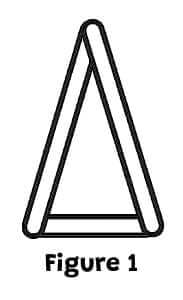
- Take two (2) of the large wood sticks & one (1) of the smaller wood sticks and glue them together in a triangular shape, like in figure 1. Do 3 times.
- Paint trees as desired, wood stars yellow and let dry.
- Glue one piece of brown paper to the bottom of each tree for the trunk. Decorate trees as desired.
Cover examples:
A: Wrap the pipe cleaner around the 3 sides.
B: Insert pipe cleaner through bell holes and wrap from one side of the tree to the other like garland.
C: Glue the 10mm pom poms around the frame randomly to look like ornaments.
- Glue the stars to the top of the decorated trees.
- Tie a tiny knot on string and glue it to the top back.
Popsicle Sleigh
Kit Includes: (5) 2.5” wood sticks, (2) 4.5” wood sticks, (1) 10mm bells, Small sprig of greenery, Small pinecones, Red Acrylic Paint, 5” string, Paint Brush
You Need: Glue or Hot Glue, Scissors Adult Supervision Required: Hot Glue and Scissors
Instructions:
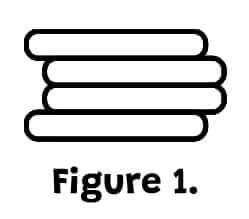
- Glue four (4) of the small wood sticks together side by side, place the two outside sticks slightly lower than the middle ones, see figure 1. Let dry.
- Paint the glued wood sticks and the remaining small wood stick red. Allow it to dry.
- Glue the two longer wood sticks to the bottom of the small wood sticks, letting them have more hanging over the top edge.
- Glue the last small wood stick across the large ones above the other small wood sticks. Let dry.
- Glue the greenery, pinecones, and bell onto the sled where desired, cut down greenery as needed.
- Tie the string around the top wood stick the form the hanger.
Baby Snowman
Kit Includes: (1) white baby sock, (1) 2” Styrofoam ball, (1) 1.5” Styrofoam ball, (1) 1” pom, Small piece of fleece, (2) black and (1) orange Bead, 5” string
You Need: Glue or Hot Glue, Scissors Adult Supervision Required: Hot Glue and Scissors
Instructions:
- Place the 2” Styrofoam ball into the toe of the baby sock.
- Place the 1.5” Styrofoam ball inside the sock on top of the first one.
- Twist the sock above the top ball and then fold the open end over the ball to form the hat. Secure hat in place with glue.
- Glue the pompom to the top of the hat.
- Glue the black beads to the head to form the eyes and the orange bead to form the nose.
- Wrap the small piece of fleece around the neck and secure in place with glue.
- Glue the piece of string to top of head to create a hanger.